Most of us weed smokers have found ourselves in this situation: We just got some good flower and plan to share it with some friends at their house. Everyone there has a lighter but somehow there are not any papers or pipes to smoke out of!
In emergency, you can always resort to buying papers and rolling yourself a joint. But not everyone has joint-rolling expertise. In situations like these, it is time to get creative and rig up your own bong.
You would be surprised how easy it can be done. All you need is a little bit of know-how and some common household supplies.
Components of a bong
A bong has a few composite parts that are mostly universal to all bongs. In order to be able to make your own bong you will need to understand its crucial components.
- Tube: The tube of the bong is perhaps the most identifiable part; it is the chamber wherein the weed smoke resides before you breathe it in. The smoke that is held here has been cooled and filtered by the water in the bowl, making it easy to intake the smoke whenever you are ready. This is the one component that does not really ever change from its straight, cylindrical appearance.
- Bowl: The bowl of the bong is where you hold your marijuana as you are using it. The weed sits there, held in the internal divot, allowing you to light it. The bowl is then connected to the stem, which allows the smoke to pass down into the tube.
- Stem: The stem of the Bong is the small, clear tube that connects the bowl and the tube. Many bongs actually have special stems that allow them to serve as more than just the simple holding device that they appear. On some bongs, the stem is the part that holds the water, freeing up the bong from having to have a wider, flared bottom in the base. Additionally, by removing the stem from its hole, the next key component of the bong is exposed.
- Carburetor: Also known as a “carb” or “choke”, this component is not necessarily included on all bongs, but important to learn because there is an essential use for it. The carb is a small hole on the glass pipe. It is located directly next to the bowl on the side of the bong. If there is a carb, be sure to cover the carb hole using your thumb or finger while inhaling the first half of your puff. Then release your finger and allow air to flow through the carb hole while you inhale the second half of your hit.
- Base: The base is the bottom part of the bong that contains the water used to cool your weed smoke. The design of this part of the bong varies between different products, but they are most generally shaped like a beaker, with a flared bottom that makes it easier to stand it up while using it.
Plastic water bottle bong

A water bottle bong is the first thing that many weed smokers have used to get high from. They are easy to make and easy to get rid of in a pinch.
These plastic bongs are not ideal to smoke from and usually are used in desperation. Be advised, smoking from plastics and foil has potential health risks and this article is not written to recommend using a plastic bottle to smoke from but rather instructions on how to build one if you so choose.
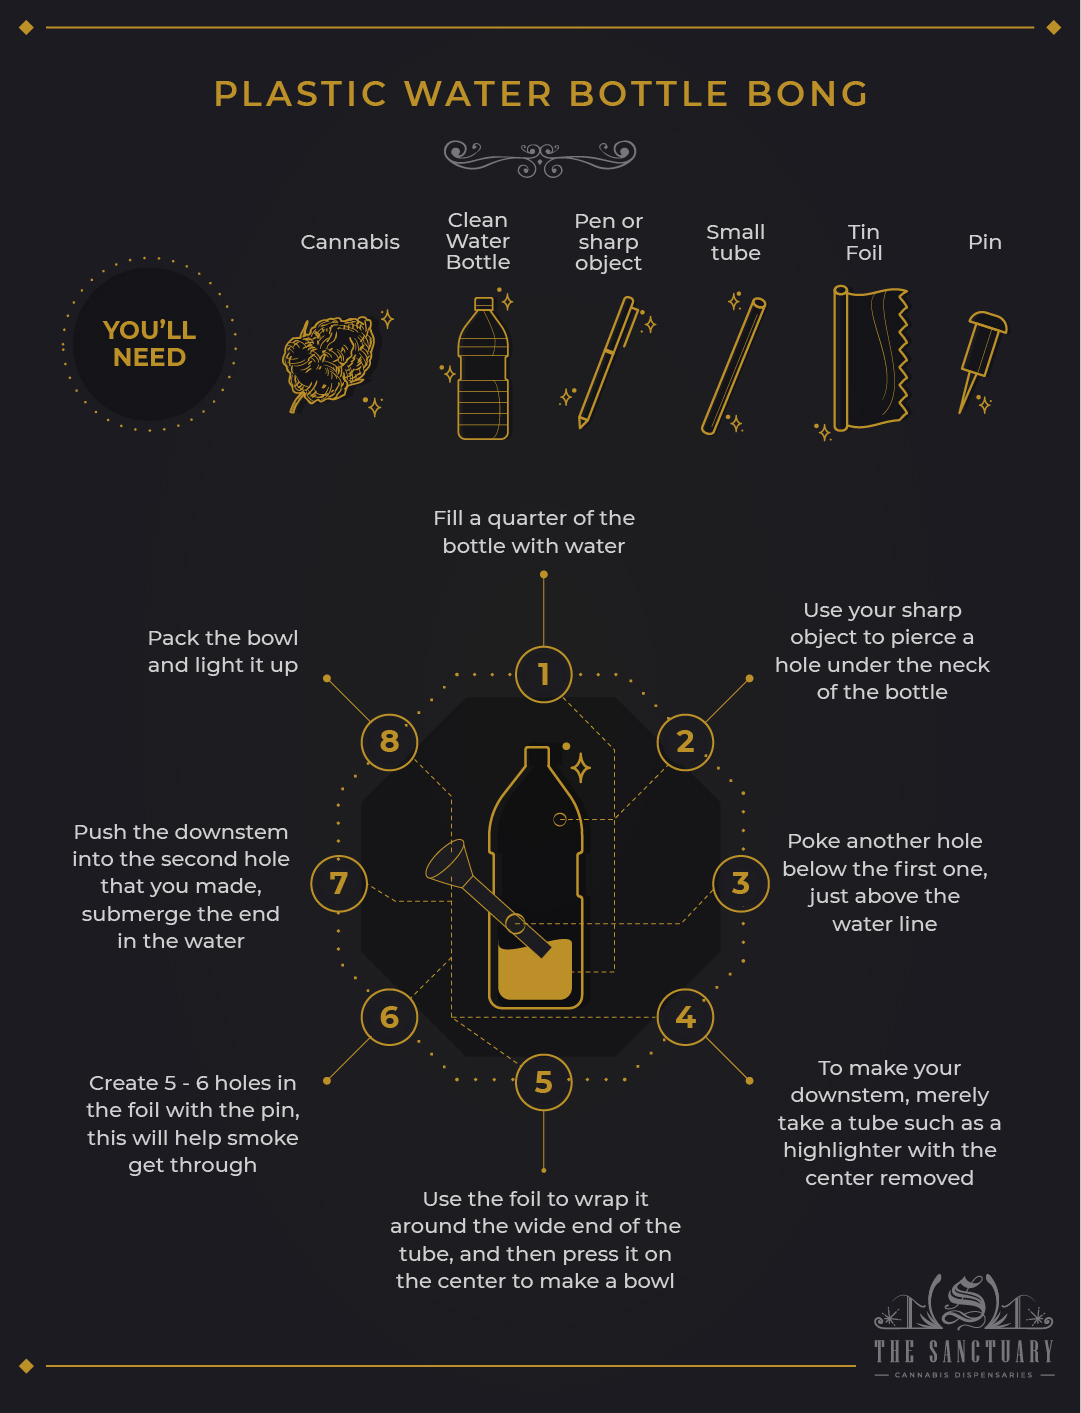
To make a water bottle bong you will need:
- Weed
- Plastic bottle
- Small knife, scissors, pen, or another sharp object to make holes with
- Skinny tube (such as an empty highlighter marker or sharpie pen)
- Tinfoil
- Needle or paper clip
The following steps will help you build a water bottle bong:
- Grab your plastic bottle and fill it with water to about a quarter way full. If you want bigger hits then find the biggest bottle you can.
- Take your sharp object and cut a hole under the top of the bottle. This is your carb hole that controls airflow.
- Now, make another hole just above the water level. This is for inserting your skinny tube.
- The skinny tube serves as a downstem. Insert the tube into the bottle, submerging the end in the water.
- Take some tinfoil and wrap it around the downstem tube in order to cover any air leaks.
- Time to make the bowl. Take some more tinfoil and make a bowl to put into your tube.
- Take your needle or paper clip and poke several holes into the tinfoil bowl for the smoke to get through.
- Put some weed into your bowl and smoke up.
Apple bong

If smoking out of plastic is not your preference, then try this next, more natural approach. Smoking from an apple may sound funny but it is fairly common in the cannabis community. If you are at someone’s house without anything to smoke from then simply go raid the kitchen.
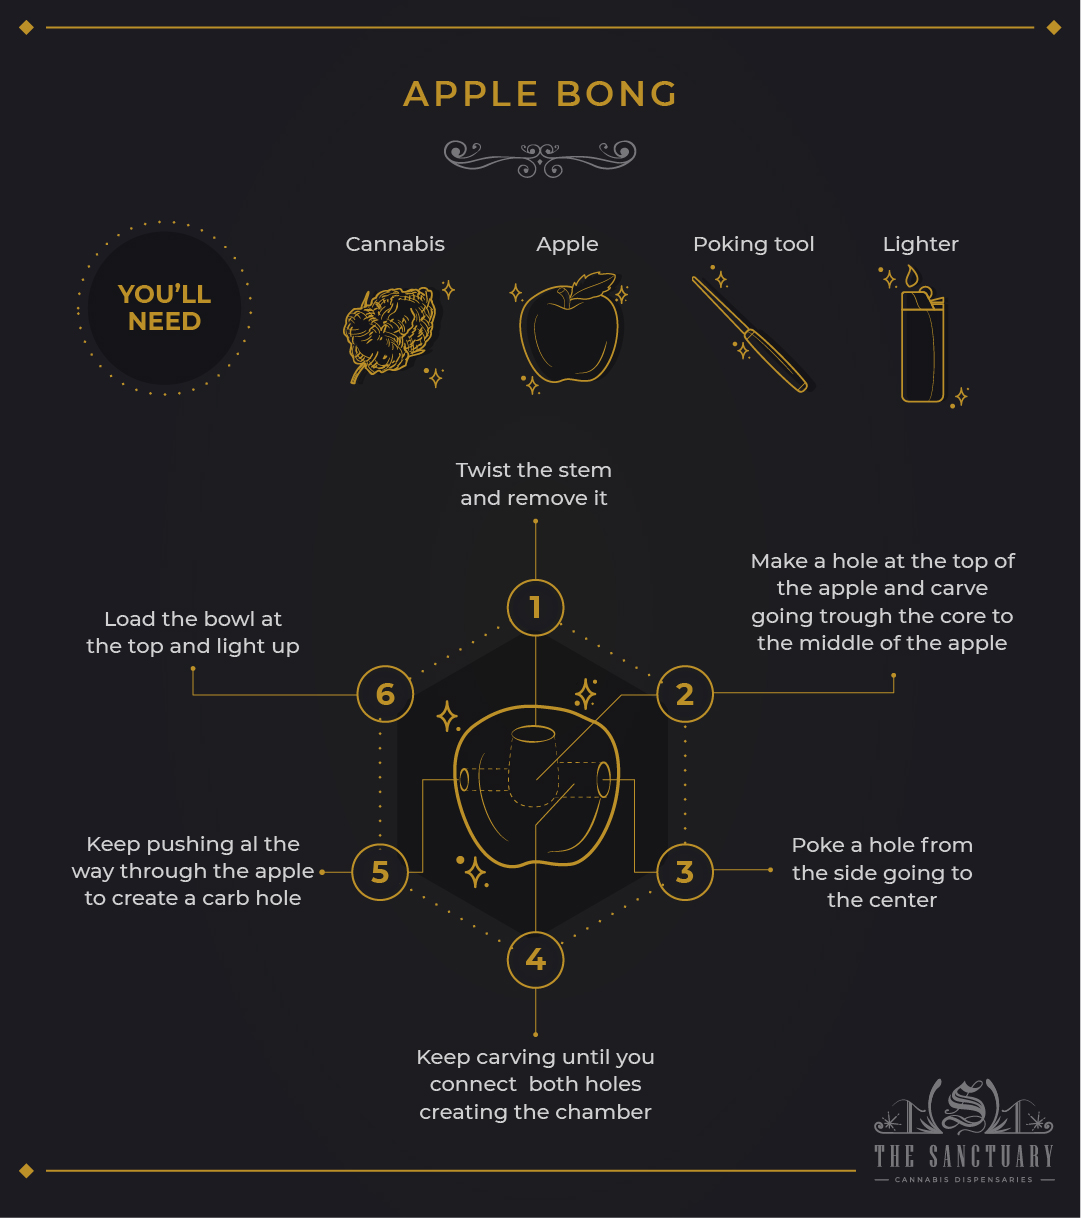
Making an apple pipe is easy and fun. To make one at home you will need:
- Cannabis
- Apple
- Poking tool (small knife, screwdriver, or chop stick, pen, etc.)
- Lighter
The steps to creating an apple bong include:
- Remove the stem; this divot in the top of the apple will serve as your bowl.
- Take the poking tool and shove a hole into the middle of the apple through the removed stem.
- Carve out a mouthpiece by jamming that pen into the side of the apple. Keep pushing the pen until you go all the way through the apple. Make sure to align this tunnel to your first hole at the top. You should now have a mouthpiece hole and a carb hole.
- Breathe through the holes to remove any loose apple debris, making sure that airflow is not restricted.
- Pack some weed on top of the apple and light it up.
Gravity bong

Most people have the supplies to make a gravity bong lying around there house. These are made using an empty two-liter soda bottle with the bottom cut out and a bowl mounted into the cap, as well as a larger container or bucket filled with water.
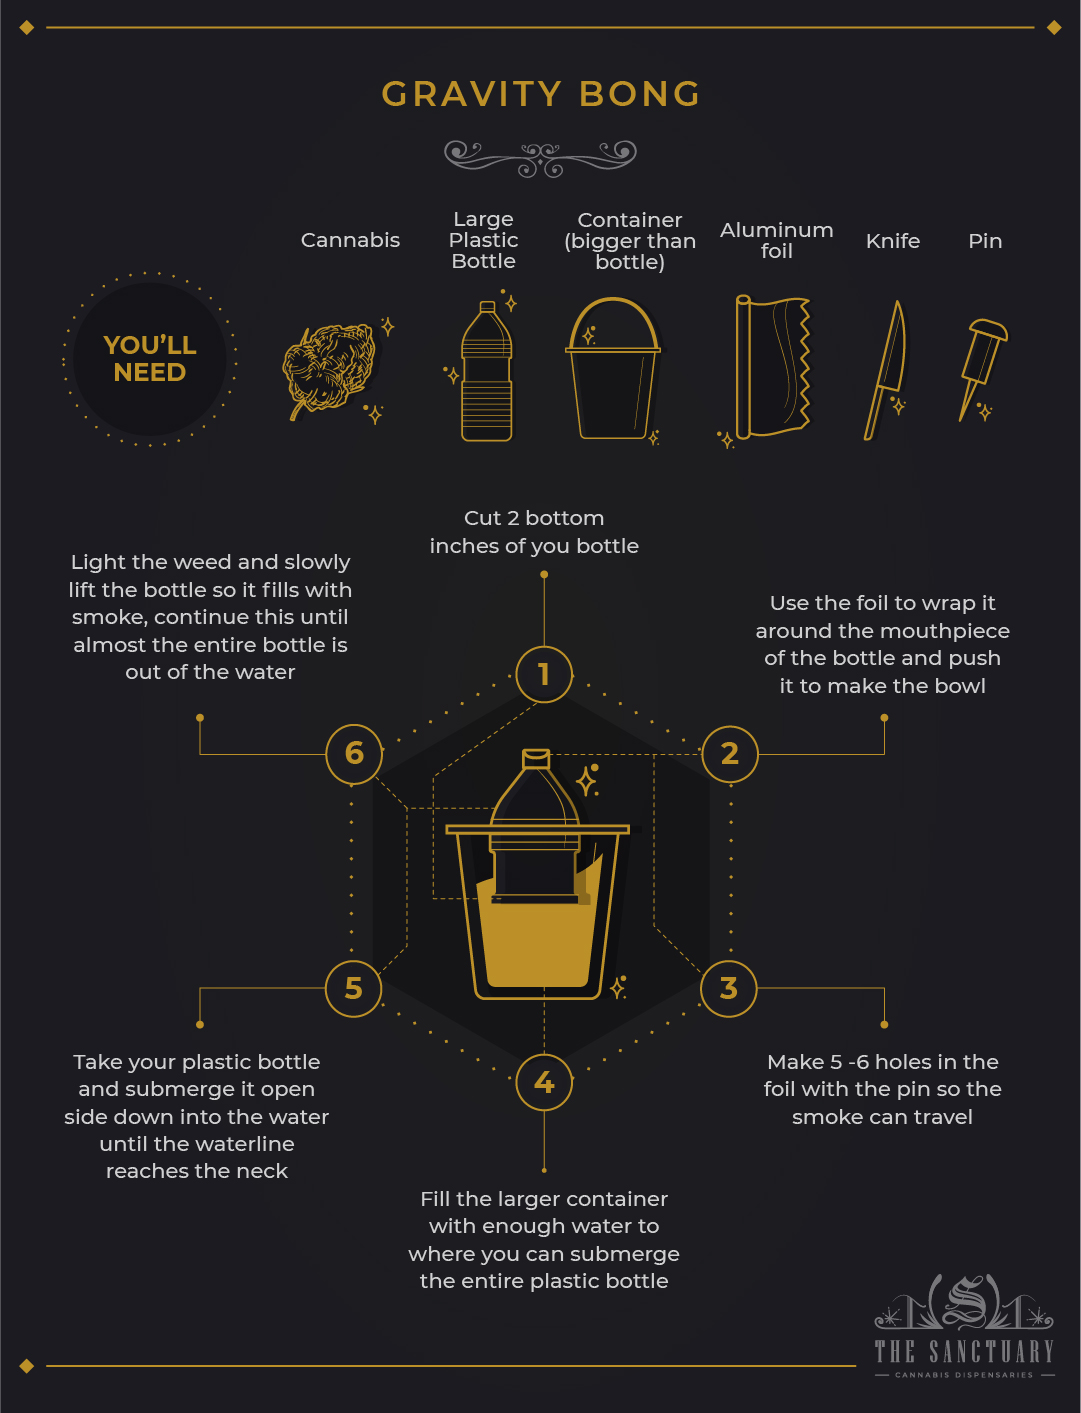
To make a gravity bong you will need:
- Large plastic bottle (two-liter soda bottle)
- A larger container or bucket (must be larger than the plastic bottle)
- Aluminum foil
- Cannabis
- Knife
- Pin
Steps to making your gravity bong include:
- Take your plastic bottle and cut off the bottom 2 inches.
- Take the foil and shape it so it can wrap around the mouthpiece of the plastic bottle. Push the foil in with your finger to shape the bowl.
- Take the pin and poke several holes in the bowl for smoke to pass through. Now, take the foil bowl off and leave it for later.
- Fill the larger container with enough water to where you can submerge the entire plastic bottle.
- Submerge your large plastic bottle into the bucket of water all the way up to the neck.
- Pack your bowl with weed. Begin lighting the bowl while slowly raising the bottle out of the water (do not pull the bottle completely out of the water or you will lose all of your smoke). This creates pressure that causes smoke to fill the bottle.
- Make sure the foil bowl is secure while lifting the bottle so it does not blow off. When the chamber is filled or the bowl is ashed, the bowl should then be removed. Inhale the smoke through the opening at the top of the bottle. Push the bottle back into the water to push the built-up smoke into your lungs.


